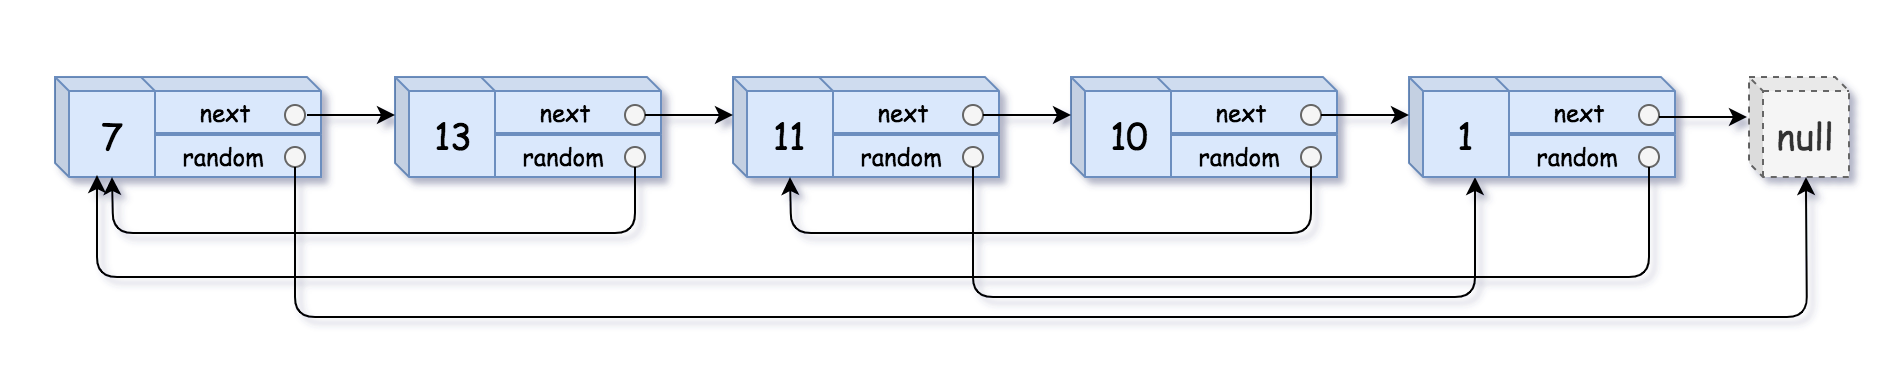
随机链表的复制 1.题目内容 给你一个长度为 n 的链表,每个节点包含一个额外增加的随机指针 random ,该指针可以指向链表中的任何节点或空节点。
构造这个链表的 深拷贝。 深拷贝应该正好由 n 个 全新 节点组成,其中每个新节点的值都设为其对应的原节点的值。新节点的 next 指针和 random 指针也都应指向复制链表中的新节点,并使原链表和复制链表中的这些指针能够表示相同的链表状态。复制链表中的指针都不应指向原链表中的节点 。
例如,如果原链表中有 X 和 Y 两个节点,其中 X.random --> Y 。那么在复制链表中对应的两个节点 x 和 y ,同样有 x.random --> y 。
返回复制链表的头节点。
用一个由 n 个节点组成的链表来表示输入/输出中的链表。每个节点用一个 [val, random_index] 表示:
val:一个表示 Node.val 的整数。random_index:随机指针指向的节点索引(范围从 0 到 n-1);如果不指向任何节点,则为 null 。
你的代码 只 接受原链表的头节点 head 作为传入参数。
示例 1:
1
2
输入:head = [[7,null],[13,0],[11,4],[10,2],[1,0]] 输出:[[7,null],[13,0],[11,4],[10,2],[1,0]]
示例 2:
1
2
输入:head = [[1,1],[2,1]] 输出:[[1,1],[2,1]]
示例 3:
1
2
输入:head = [[3,null],[3,0],[3,null]] 输出:[[3,null],[3,0],[3,null]]
提示:
0 <= n <= 1000-104 <= Node.val <= 104Node.random 为 null 或指向链表中的节点。
2.解法 (1)回溯+哈希表 思路及算法
本题要求我们对一个特殊的链表进行深拷贝。如果是普通链表,我们可以直接按照遍历的顺序创建链表节点。而本题中因为随机指针的存在,当我们拷贝节点时,「当前节点的随机指针指向的节点」可能还没创建,因此我们需要变换思路。一个可行方案是,我们利用回溯的方式,让每个节点的拷贝操作相互独立。对于当前节点,我们首先要进行拷贝,然后我们进行「当前节点的后继节点」和「当前节点的随机指针指向的节点」拷贝,拷贝完成后将创建的新节点的指针返回,即可完成当前节点的两指针的赋值。
具体地,我们用哈希表记录每一个节点对应新节点的创建情况。遍历该链表的过程中,我们检查「当前节点的后继节点」和「当前节点的随机指针指向的节点」的创建情况。如果这两个节点中的任何一个节点的新节点没有被创建,我们都立刻递归地进行创建。当我们拷贝完成,回溯到当前层时,我们即可完成当前节点的指针赋值。注意一个节点可能被多个其他节点指向,因此我们可能递归地多次尝试拷贝某个节点,为了防止重复拷贝,我们需要首先检查当前节点是否被拷贝过,如果已经拷贝过,我们可以直接从哈希表中取出拷贝后的节点的指针并返回即可。
在实际代码中,我们需要特别判断给定节点为空节点的情况。
代码
1
2
3
4
5
6
7
8
9
10
11
12
13
14
15
16
17
18
//C++ class Solution { public: unordered_map<Node*, Node*> cachedNode; Node* copyRandomList(Node* head) { if (head == nullptr) { return nullptr; } if (!cachedNode.count(head)) { Node* headNew = new Node(head->val); cachedNode[head] = headNew; headNew->next = copyRandomList(head->next); headNew->random = copyRandomList(head->random); } return cachedNode[head]; } };
1
2
3
4
5
6
7
8
9
10
11
12
13
14
15
16
17
//Java class Solution { Map<Node, Node> cachedNode = new HashMap<Node, Node>(); public Node copyRandomList(Node head) { if (head == null) { return null; } if (!cachedNode.containsKey(head)) { Node headNew = new Node(head.val); cachedNode.put(head, headNew); headNew.next = copyRandomList(head.next); headNew.random = copyRandomList(head.random); } return cachedNode.get(head); } }
复杂度分析
(2)迭代+节点拆分 思路及算法
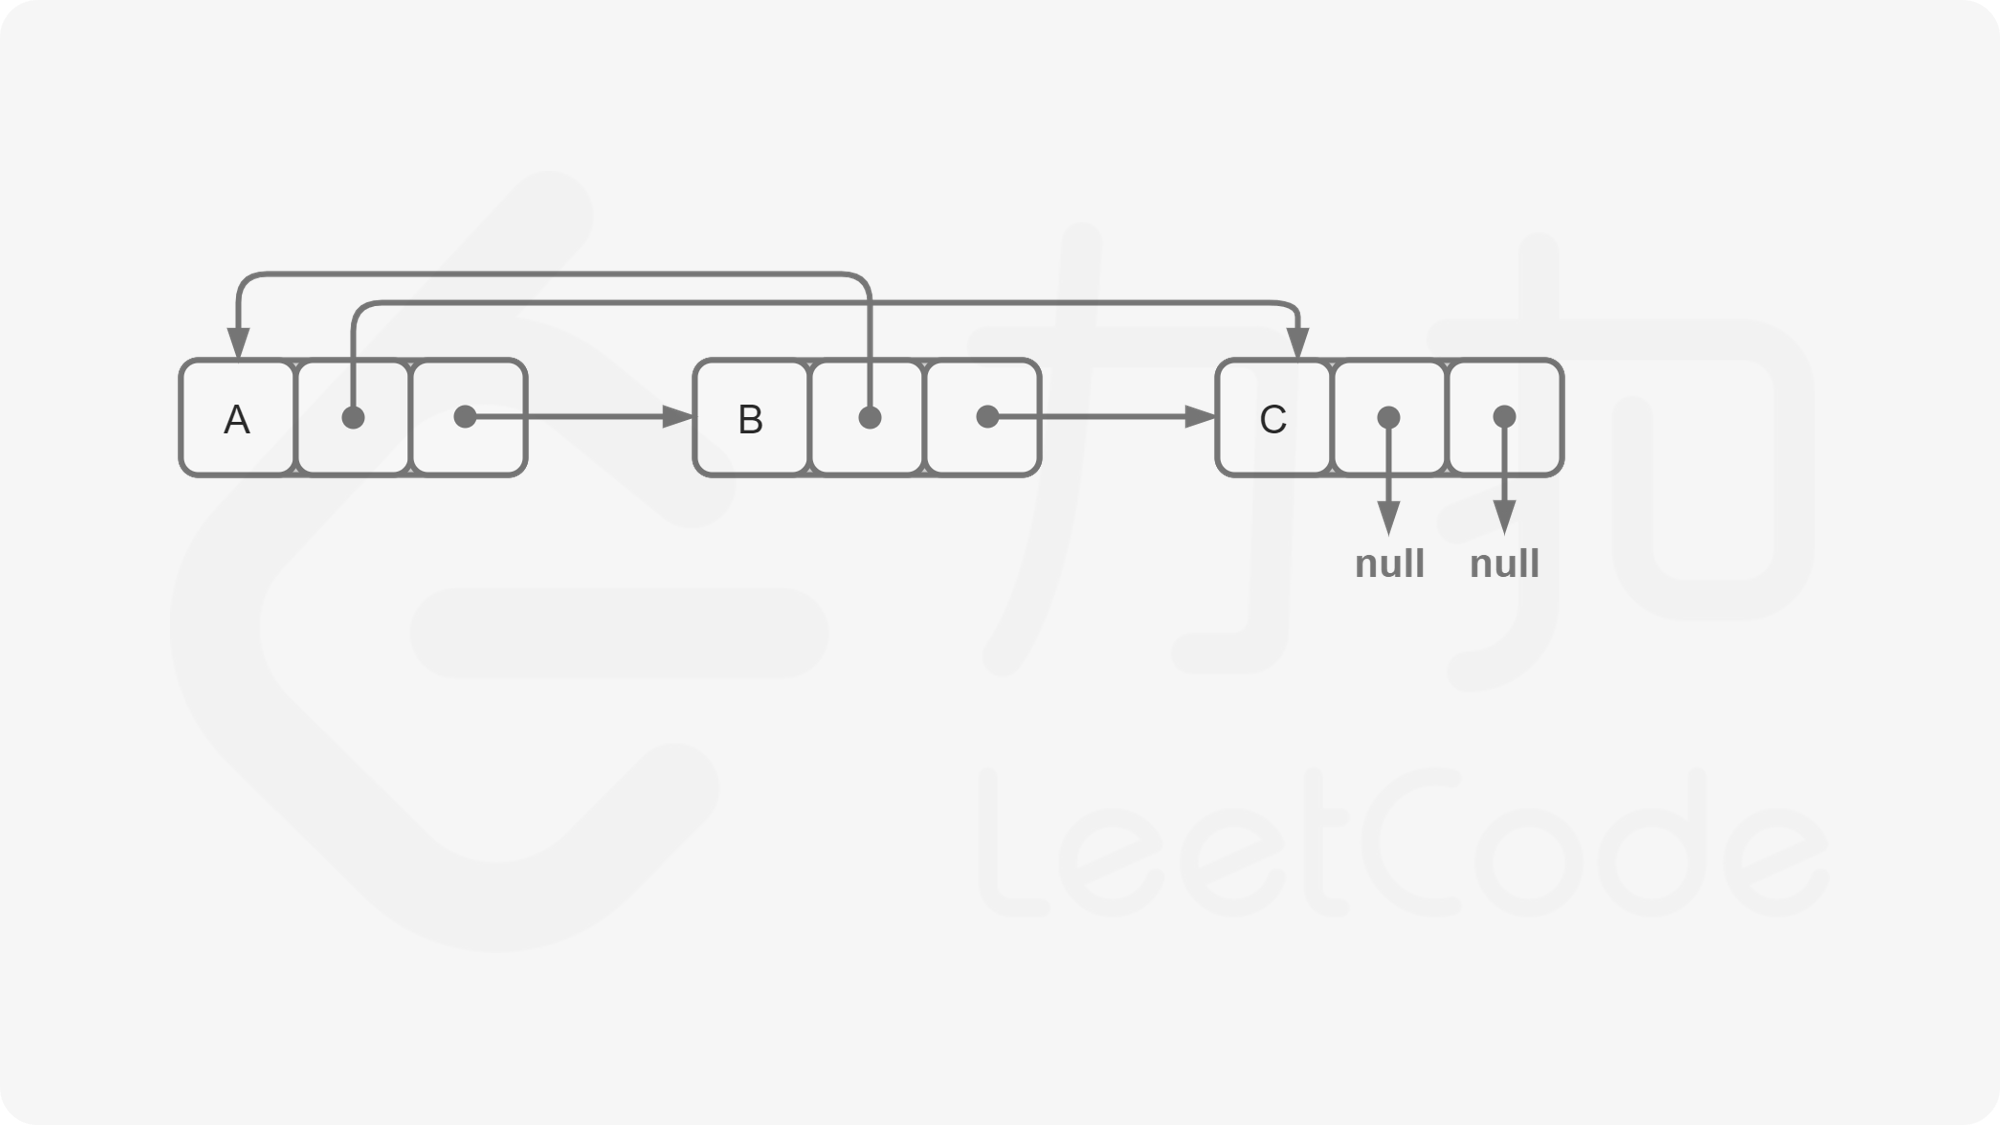
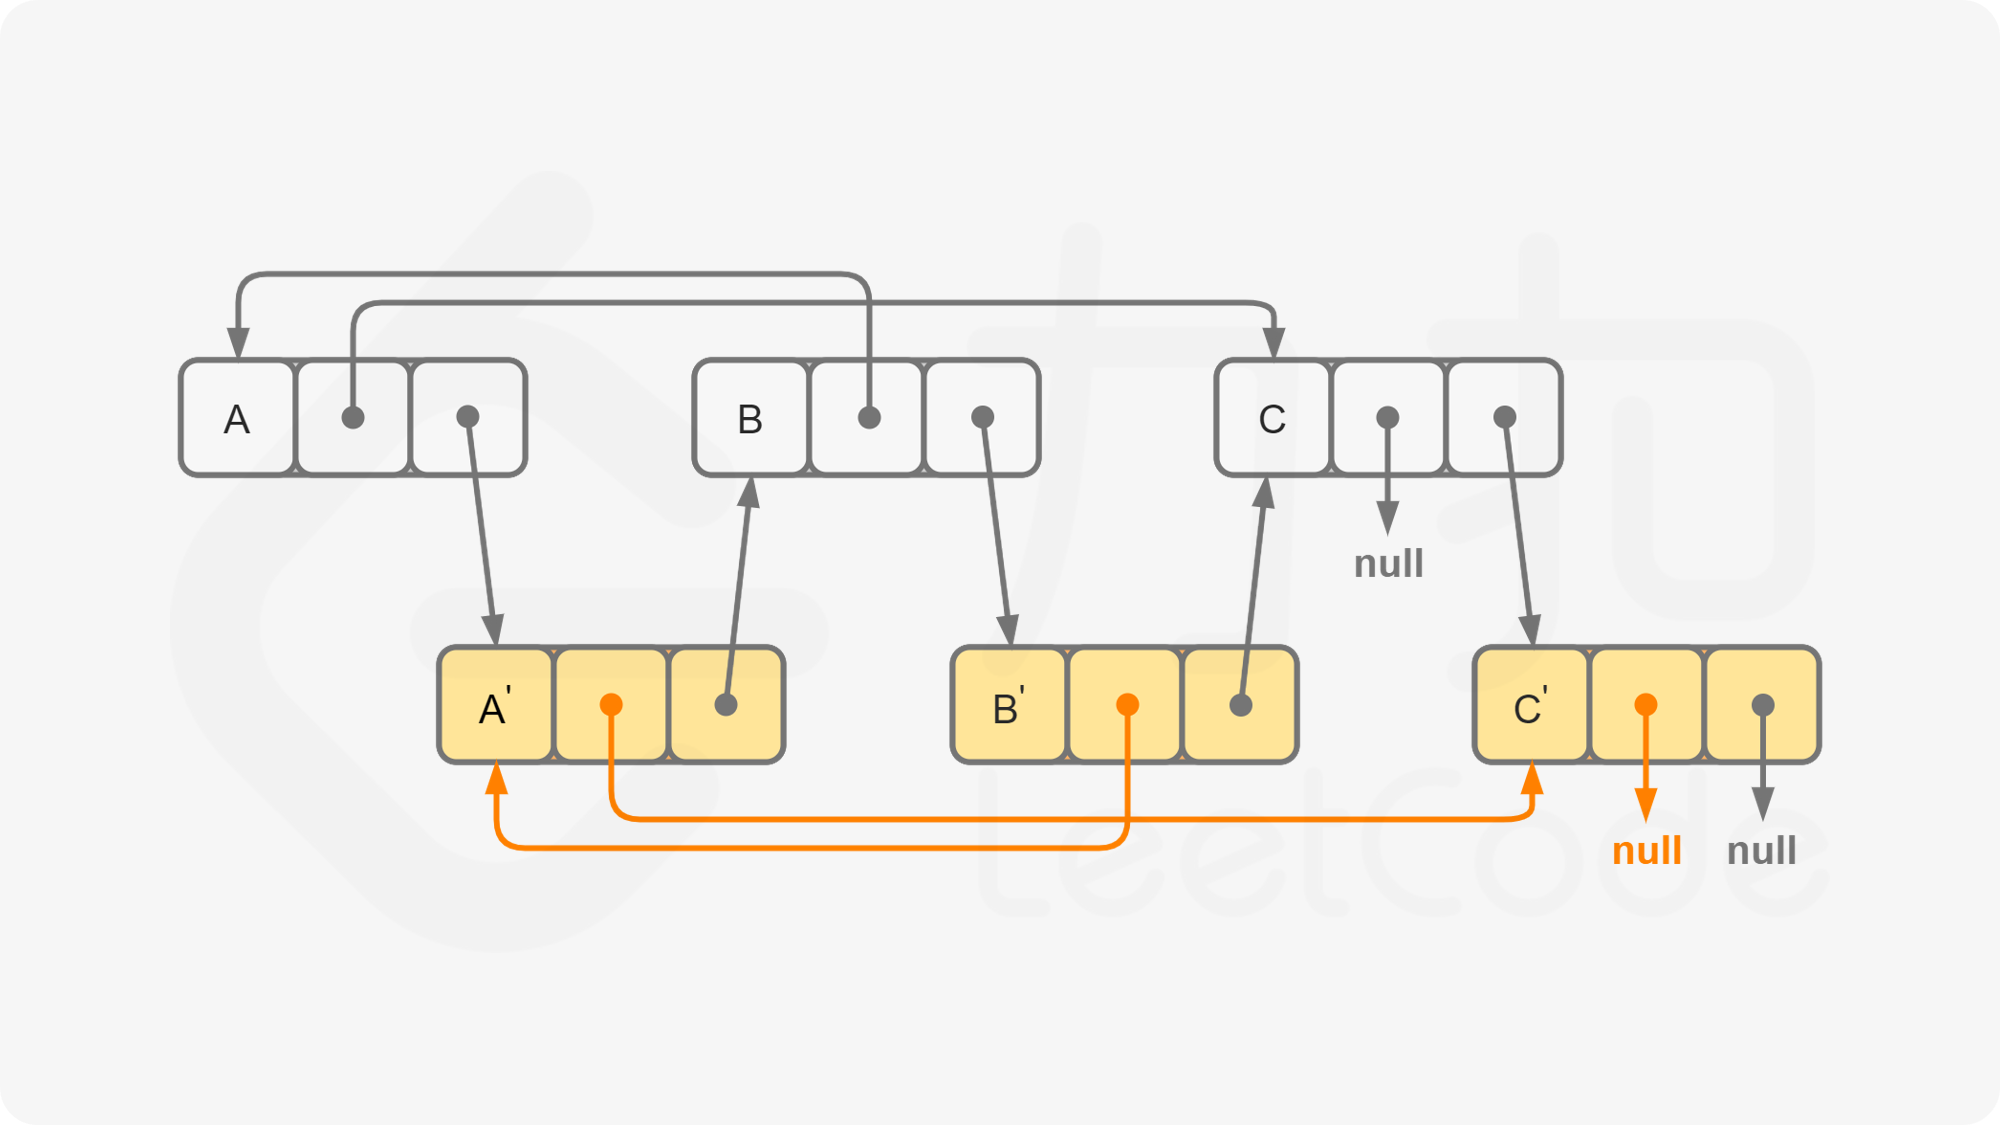
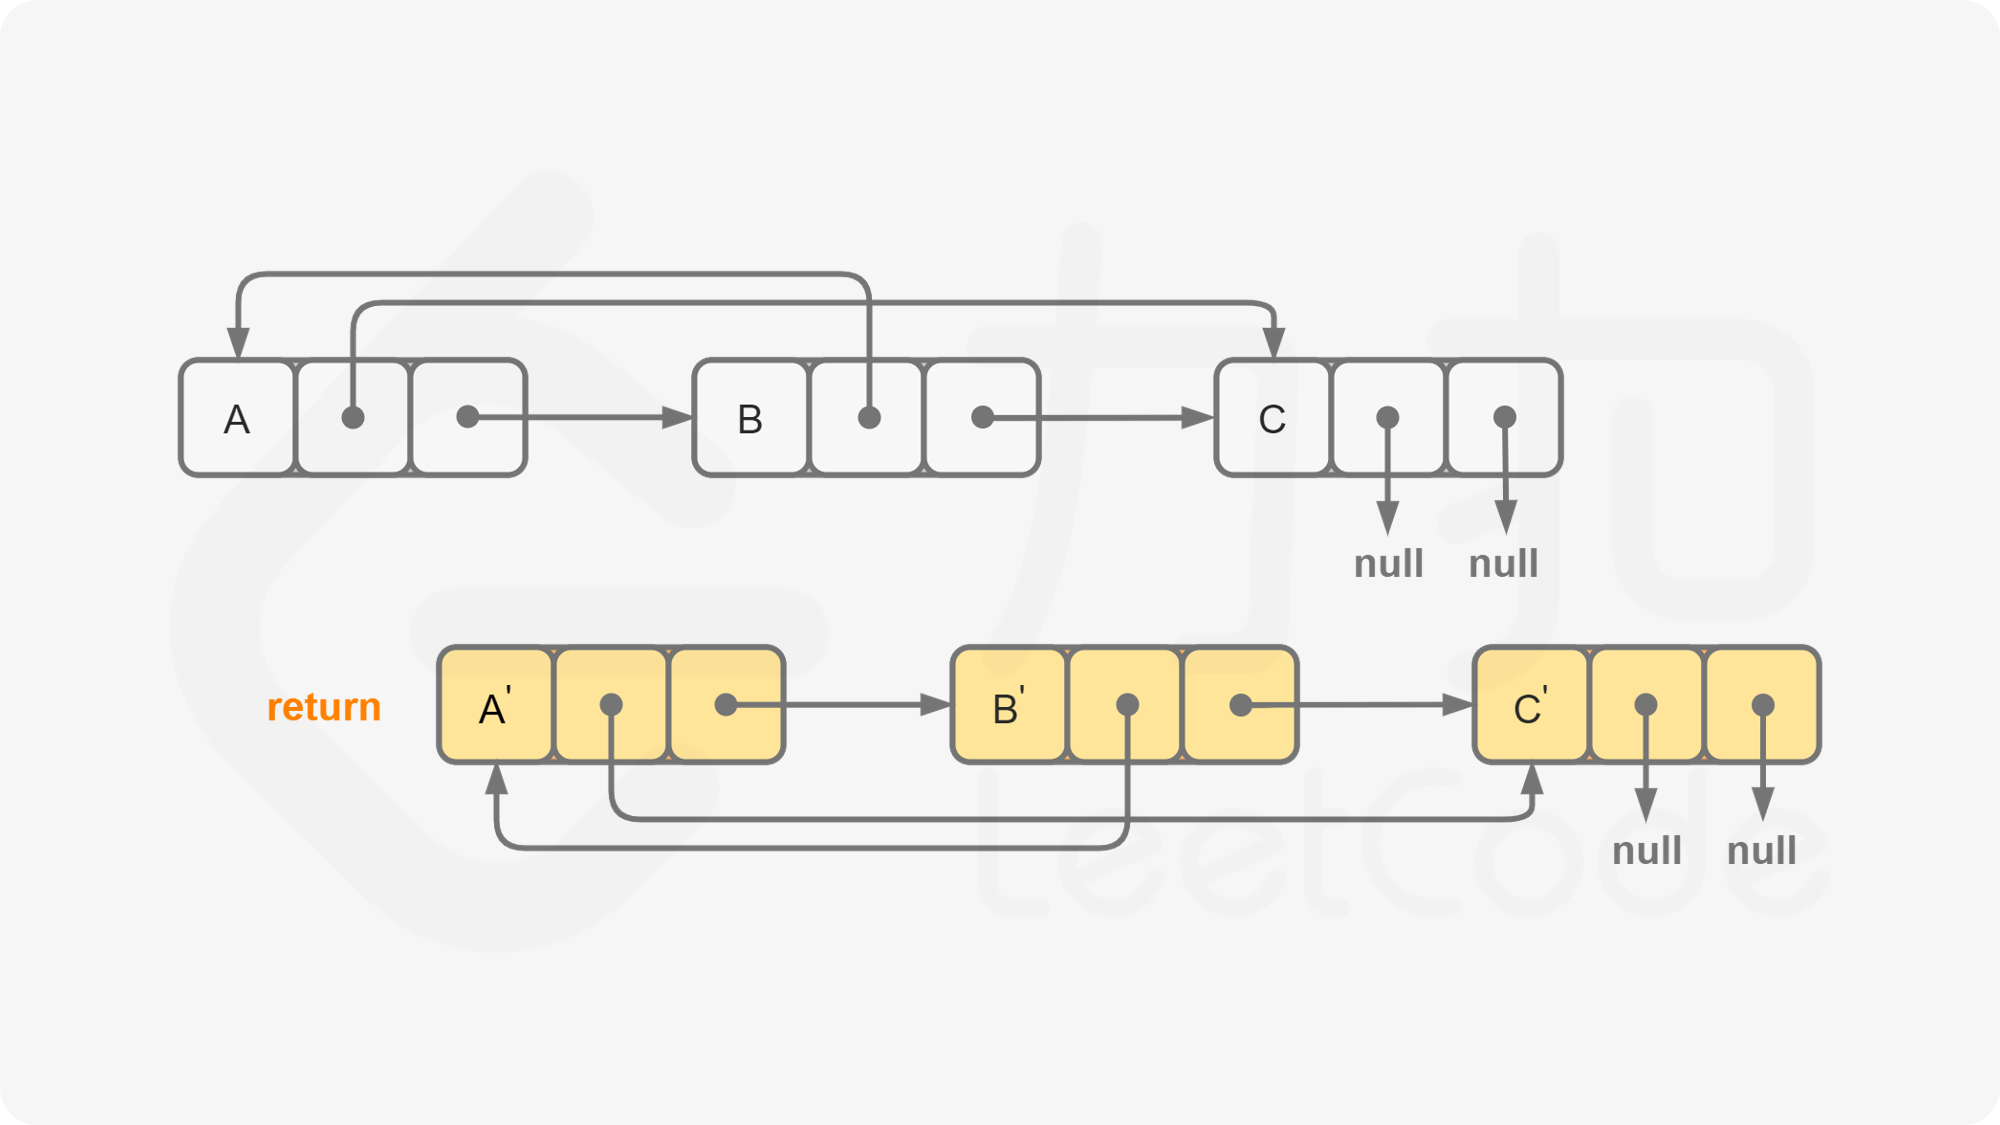
我们首先将该链表中每一个节点拆分为两个相连的节点,例如对于链表 A→B→C,我们可以将其拆分为 A→A′→B→B′→C→C′。对于任意一个原节点 S,其拷贝节点 S’ 即为其后继节点。这样,我们可以直接找到每一个拷贝节点 S′ 的随机指针应当指向的节点,即为其原节点 S 的随机指针指向的节点 T 的后继节点 T′ 。需要注意原节点的随机指针可能为空,我们需要特别判断这种情况。
当我们完成了拷贝节点的随机指针的赋值,我们只需要将这个链表按照原节点与拷贝节点的种类进行拆分即可,只需要遍历一次。同样需要注意最后一个拷贝节点的后继节点为空,我们需要特别判断这种情况。
代码
1
2
3
4
5
6
7
8
9
10
11
12
13
14
15
16
17
18
19
20
21
22
23
24
25
//C++ class Solution { public: Node* copyRandomList(Node* head) { if (head == nullptr) { return nullptr; } for (Node* node = head; node != nullptr; node = node->next->next) { Node* nodeNew = new Node(node->val); nodeNew->next = node->next; node->next = nodeNew; } for (Node* node = head; node != nullptr; node = node->next->next) { Node* nodeNew = node->next; nodeNew->random = (node->random != nullptr) ? node->random->next : nullptr; } Node* headNew = head->next; for (Node* node = head; node != nullptr; node = node->next) { Node* nodeNew = node->next; node->next = node->next->next; nodeNew->next = (nodeNew->next != nullptr) ? nodeNew->next->next : nullptr; } return headNew; } };
1
2
3
4
5
6
7
8
9
10
11
12
13
14
15
16
17
18
19
20
21
22
23
24
//Java class Solution { public Node copyRandomList(Node head) { if (head == null) { return null; } for (Node node = head; node != null; node = node.next.next) { Node nodeNew = new Node(node.val); nodeNew.next = node.next; node.next = nodeNew; } for (Node node = head; node != null; node = node.next.next) { Node nodeNew = node.next; nodeNew.random = (node.random != null) ? node.random.next : null; } Node headNew = head.next; for (Node node = head; node != null; node = node.next) { Node nodeNew = node.next; node.next = node.next.next; nodeNew.next = (nodeNew.next != null) ? nodeNew.next.next : null; } return headNew; } }
复杂度分析
时间复杂度:O(n),其中 n 是链表的长度。我们只需要遍历该链表三次。
空间复杂度:O(1)。注意返回值不计入空间复杂度。